
Understanding the performance of your website is crucial for success. Google Analytics provides valuable insights into user behavior, helping you make informed decisions to enhance your online presence. This article will guide you on how to set up Google Analytics in WordPress.
What is Google Analytics?

Google Analytics is a powerful web analytics service offered by Google. It allows website owners to track and analyze various aspects of their site’s performance, providing data on user engagement, traffic sources, and much more.
How Will Google Analytics Help Websites to Grow?
Understanding your audience is key to improving your website. Google Analytics provides valuable information about your visitors, allowing you to tailor your content and marketing strategies to meet their needs effectively.
Google Analytics offers a plethora of data, including:
- Traffic Sources: Know where your visitors are coming from.
- User Behavior: Understand how users interact with your site.
- Conversion Tracking: Measure the success of your goals.
- Site Content Analysis: Identify your most popular pages.
Steps on How to Set Up Google Analytics in WordPress
Setting up Google Analytics on your WordPress website is crucial for understanding your audience and enhancing your online presence. In this guide, we’ll take you through each step, ensuring a smooth process even for beginners.
Step 1: Access Google Analytics
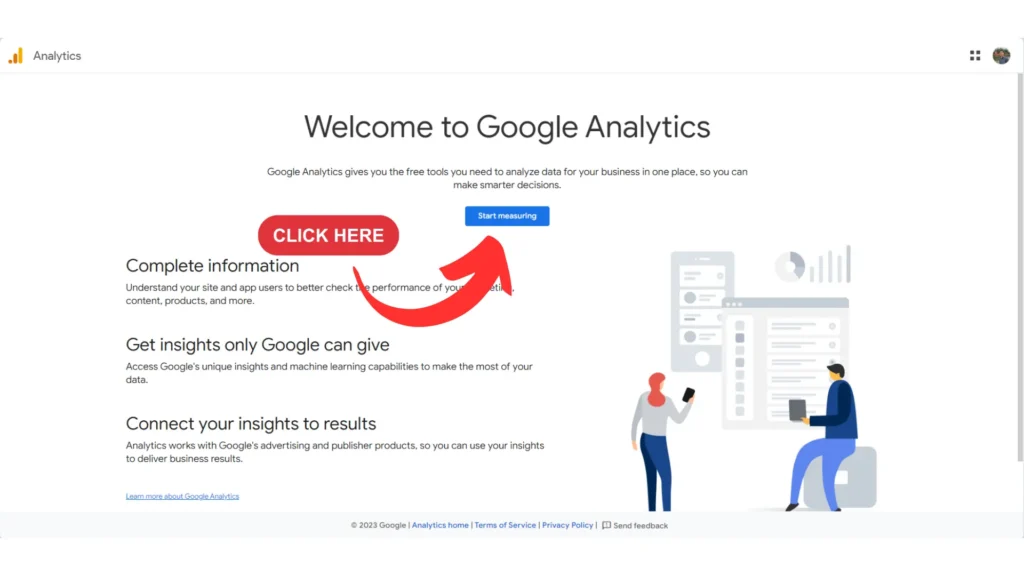
Begin by visiting https://google.com/analytics and sign in to your Google account. If you don’t have one, creating an account is quick and easy.
Step 2: Navigate to Admin
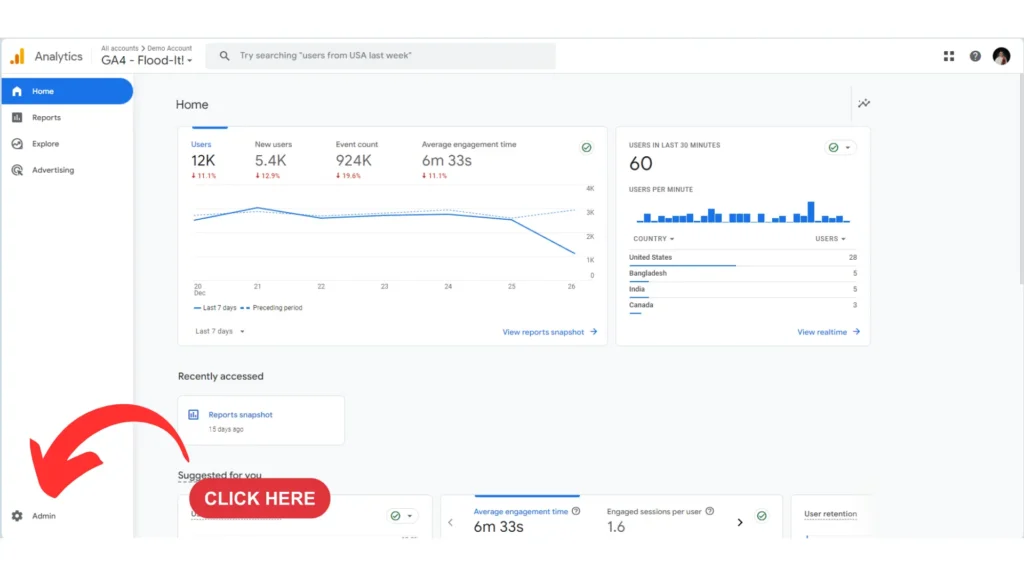
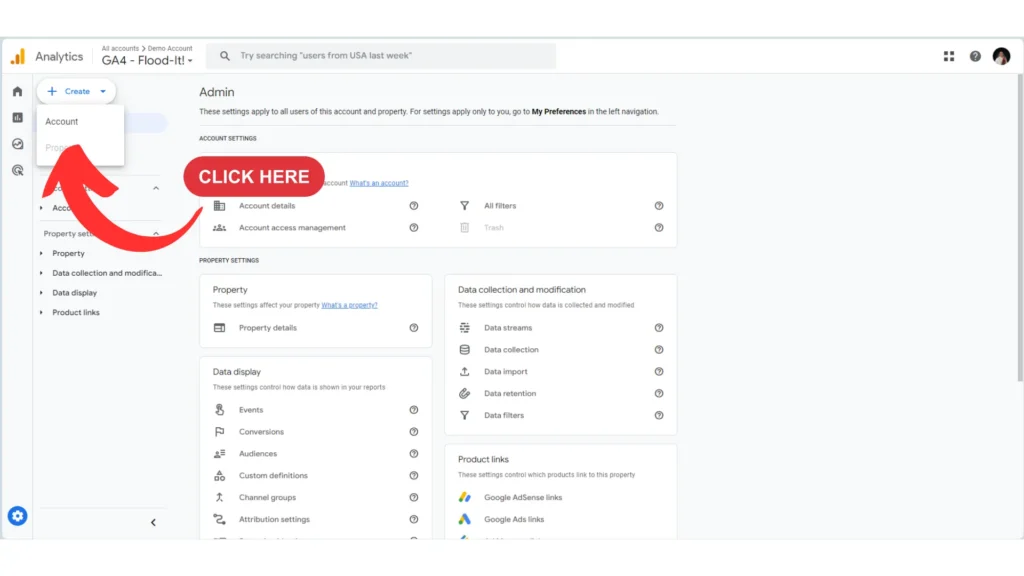
For the first time setting up, proceed to step 4. If you already tracked other properties, on the left pane menu, find and click on “Admin.” Then click Create, Select “Account”
Step 3: Create an Account
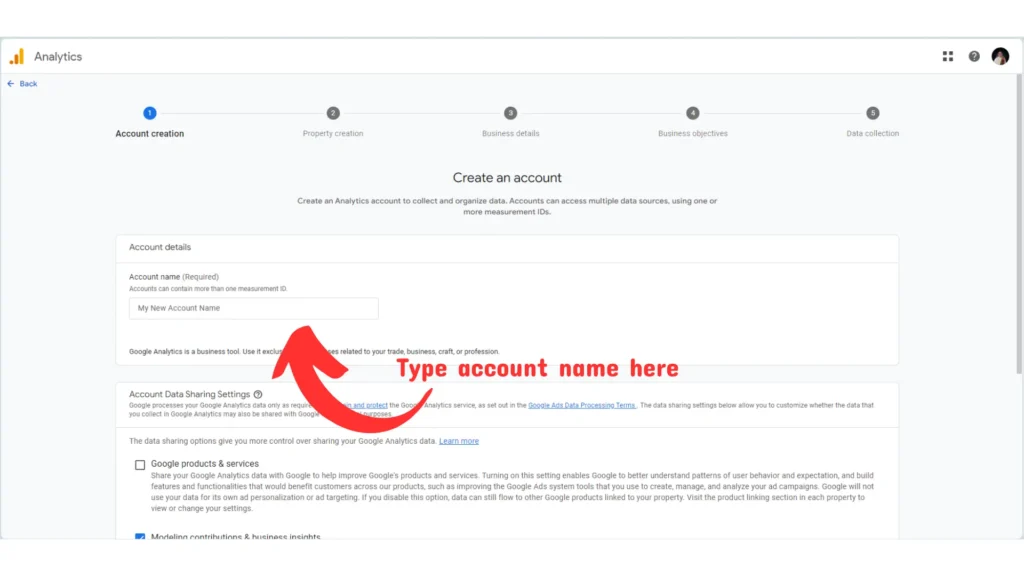
Under “Account,” click “Create an account.” Fill in the account name and check all the boxes. This step ensures you have a dedicated space for your website analytics.
Step 4: Property Creation
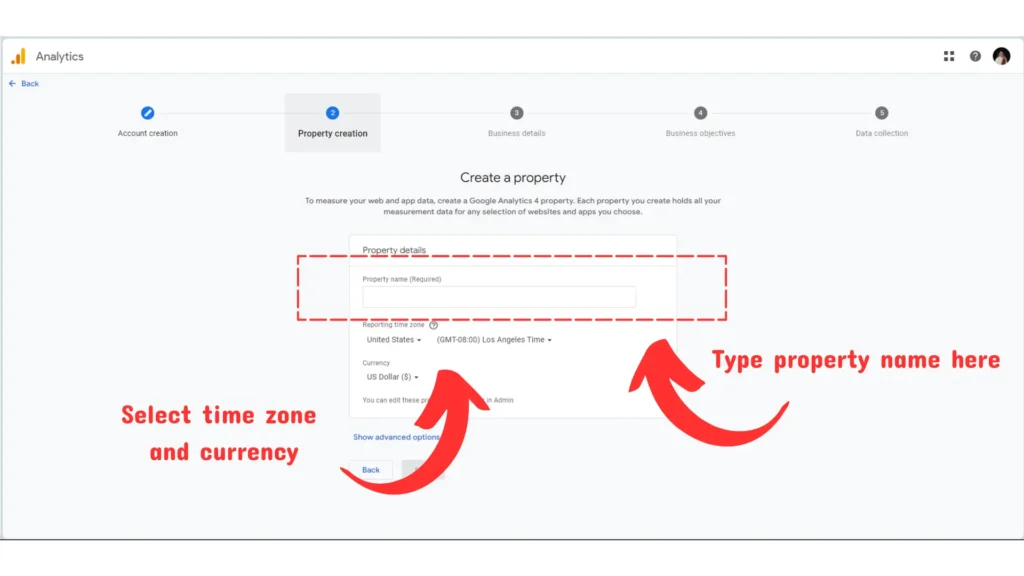
Now, name your property. Wondering what a property is? In Google Analytics, a “property” refers to a website, mobile app, or other digital asset that you want to track and analyze.
Step 5: Set Time Zone and Currency
Select your time zone and currency preferences, then click “Next.”
Step 6: Business Details
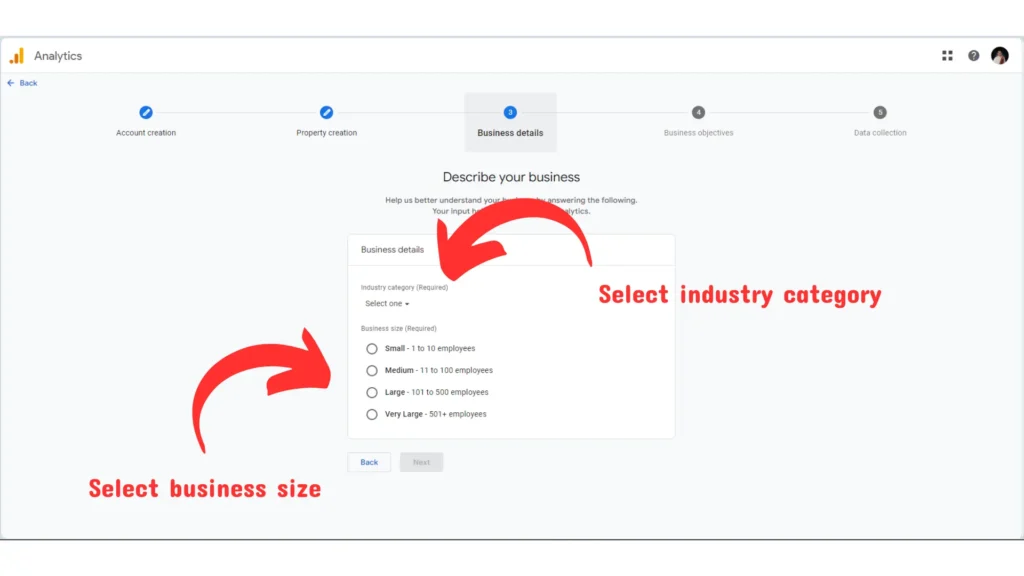
Provide your business details by selecting an industry category and business size. Click “Next” to proceed.
Step 7: Business Objectives
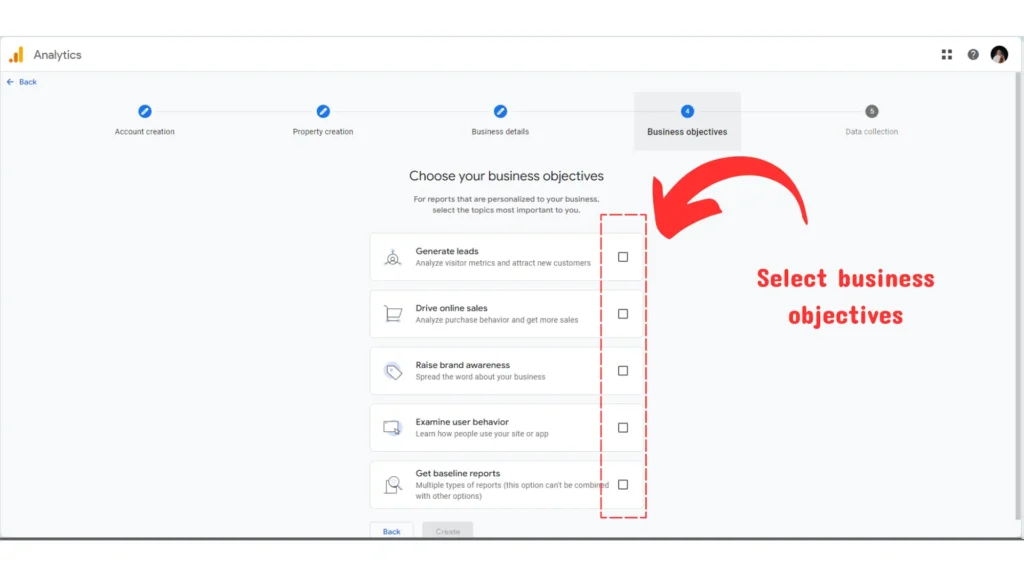
Choose a business objective based on your goals. You can select multiple options such as generating leads, driving online sales, raising brand awareness, or examining user behavior. You may also choose to get the baseline reports.
Step 8: Accept Terms
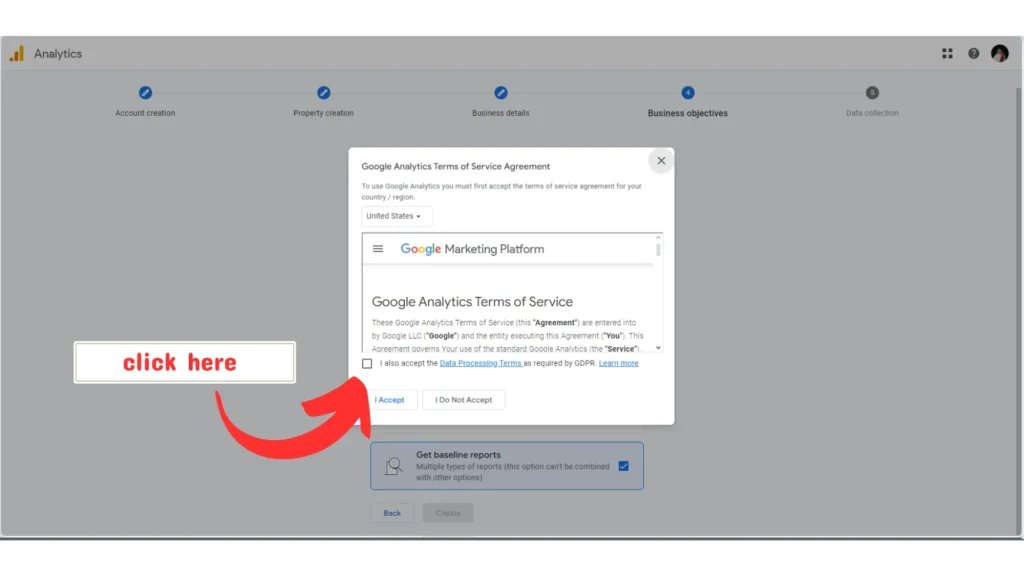
Read the Google Analytics terms of service agreement, then check the box to accept the terms. Click “I Accept” to move forward.
Step 9: Data Collection
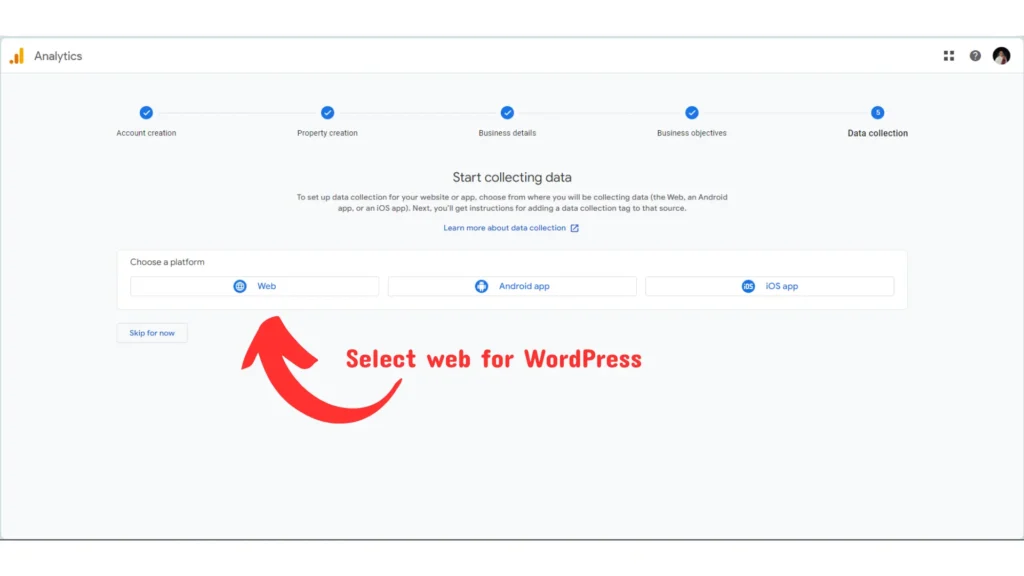
Select the platform for data collection—Web, Android app, or iOS app. Choose the one relevant to your website. For WordPress, choose web.
Step 10: Set Up Data Stream
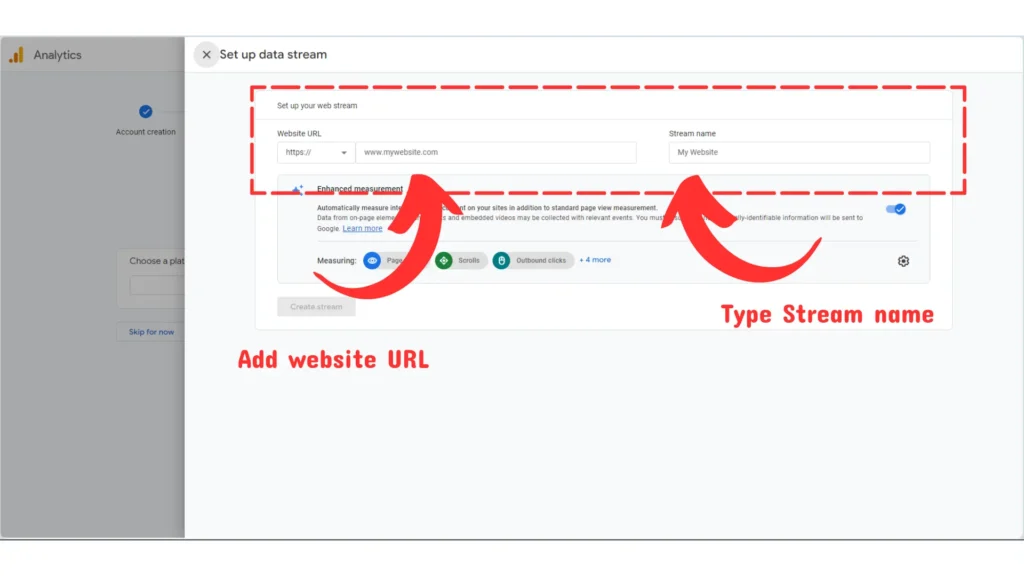
Enter your website URL and stream name. Click “Create Stream” to proceed.
Step 11: Install Google Tag
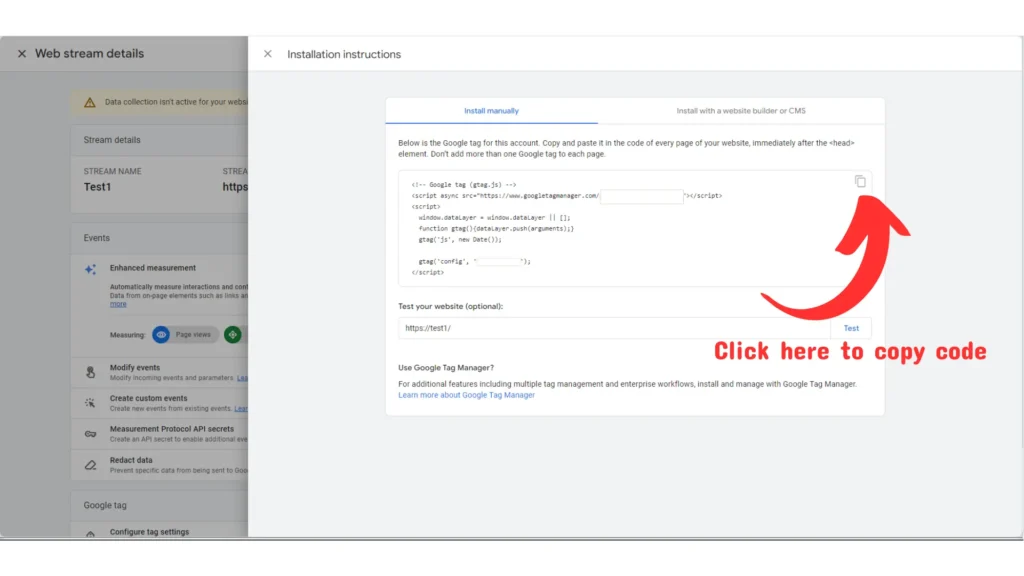
Click “View Tag Instructions” on the web stream details. In the “Install Manually” tab, copy the code provided.
Step 12: WordPress Installation
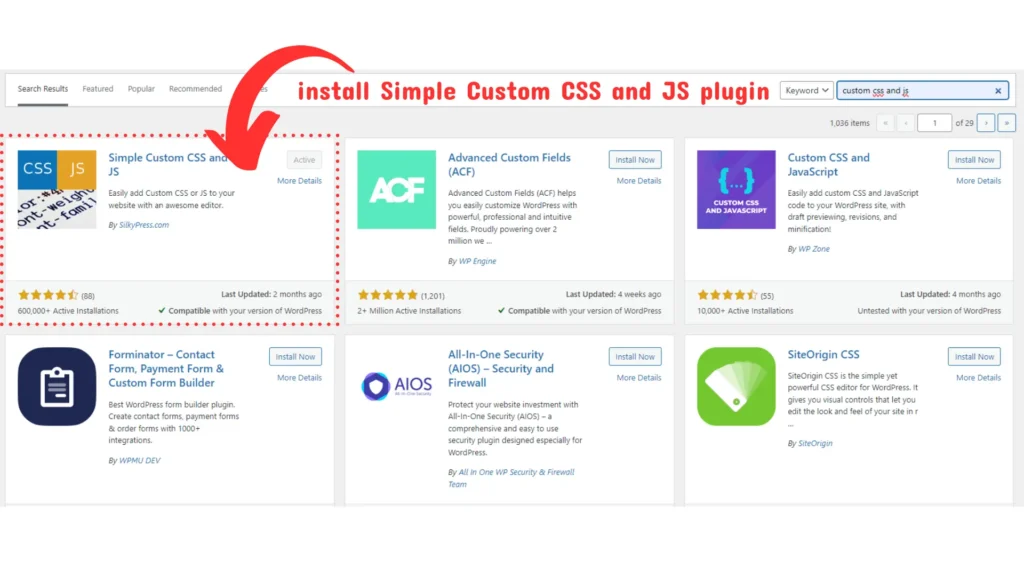
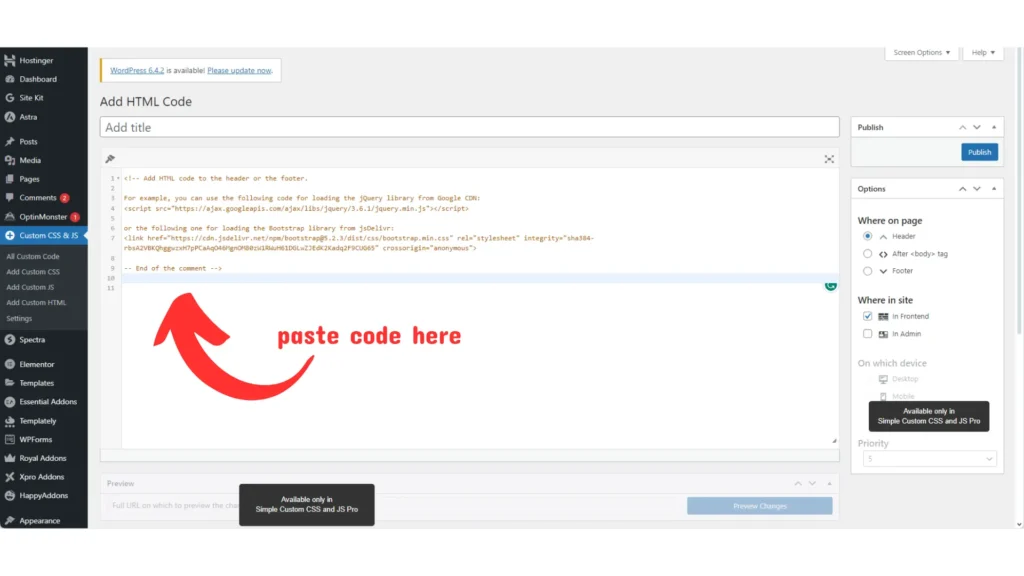
On your WordPress dashboard, click plugin and add new. Install the “Custom CSS and JS” free plugin.
Step 13: Add Custom Code
Add a custom HTML. Paste the copied code from the Google tag into the “Custom CSS and JS” plugin. Add a title. Click “Publish” to complete the installation.
Step 14: Verify Installation
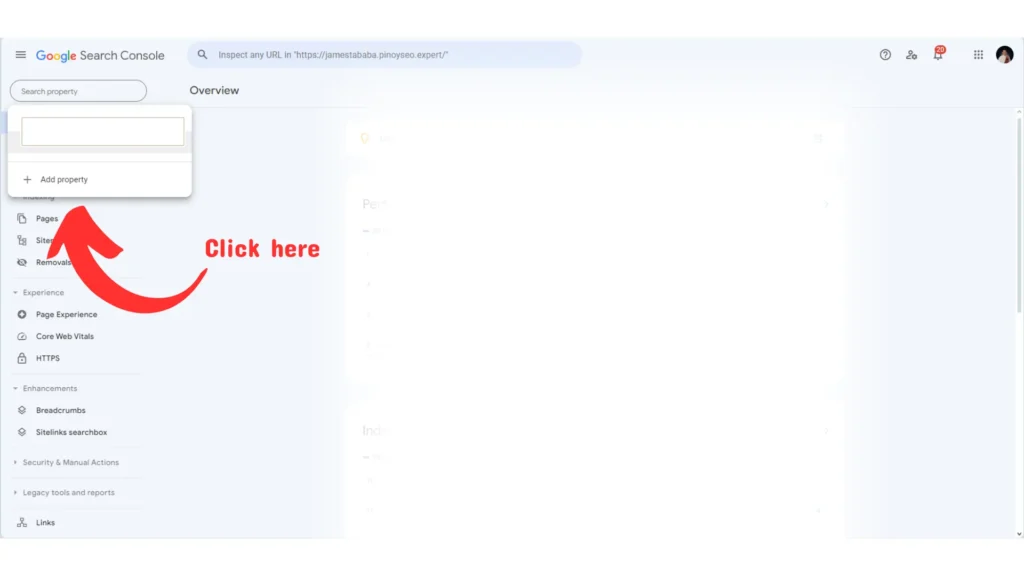
Congratulations! Google Analytics is now set up on your website. Consider setting up Google Search Console at https://search.google.com/search-console for additional insights. Navigate to the Google Search Console, click “Add Property,”
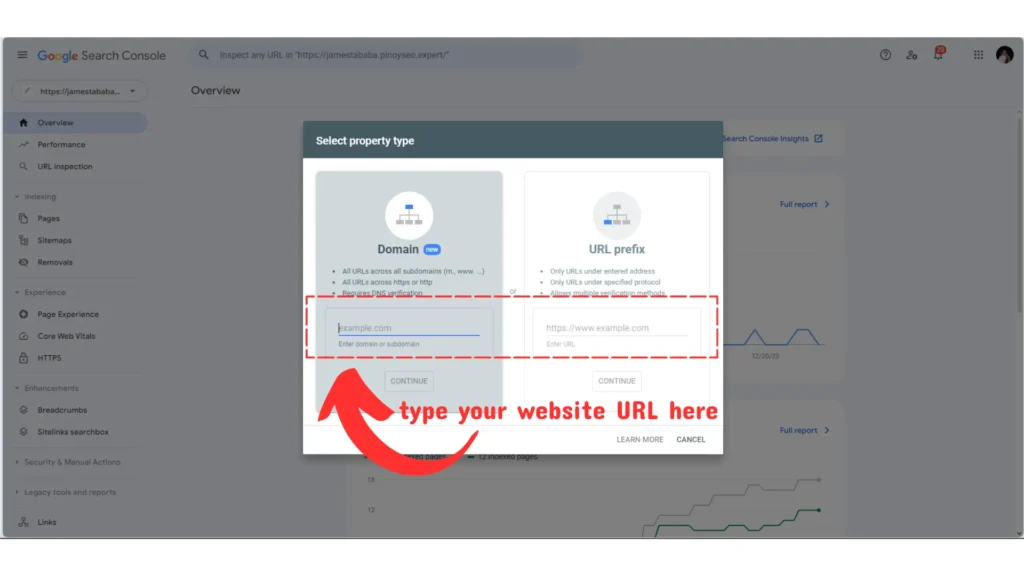
Step 15: Set Up Google Search Console
Select your website, add your URL under “Domain” or “URL Prefix,” and click “Continue.” The property will be automatically verified.
By following these simple steps, you’ve successfully learned how to set up Google Analytics in your WordPress site, allowing you to track valuable insights and optimize your online presence. Don’t forget to explore the Google Search Console for even more comprehensive analytics.
Frequently Asked Questions
Yes, Google Analytics offers a free version with robust features. There’s also a premium version for enterprise-level users.
Absolutely! You can track multiple websites under one Google Analytics account.
Regular check-ins are key to staying informed about your website’s performance. Aim for monthly reviews.
Certainly! Google Analytics supports tracking for both Android and iOS mobile apps
Google Analytics is crucial for SEO as it provides essential insights into website performance. By analyzing visitor behavior, identifying traffic sources, and tracking keyword performance, it guides content strategy and optimization efforts. The tool offers a deep dive into page performance, aids in conversion tracking, and helps enhance user experience, all of which contribute to improved search engine rankings.
